Monday, December 22, 2008

Using the Clinometer


The Clinometer is such a fun instrument to teach kids to use!

Here is the process in a nutshell:

For the Sun:
  1. Hold the clinometer near the ground.
  2. Point the soda straw at the sun.
  3. When you see the bright spot of the Sun surrounded by the shadow of the soda straw (the sunlight is passing through the straw), on the ground or the palm of your hand,
  4. Read the angle where the thread (attached to the paper clip) crosses the angle indicated on the protractor.

For the moon, stars, and planets:

  1. Look through the straw at the object
  2. Read the angle where the thread (attached to the paper clip) crosses the angle indicated on the protractor.

Before you use the Clinometer outside, be sure to stress that every instrument MUST be calibrated first. Ask them how they can be sure their Clinometer is calibrated. This one is pretty simple. If they hold the Clinometer so the string swings to the 90 degrees, then there should be a right angle between the string and the straw. They can all use the corner of a piece of paper to check. Have partners check each other. Unless they did something drastically wrong, all of them will be calibrated.

Now help your students become "conversant" in the use of their Clinometers by measuring the altitude of objects in the room.First show them how to use the Clinometer by sighting objects through the straw and catching the plumb bob string with their finger and then lowering the Clinometer, carefully holding the string and reading the altitude.

This is NOT, of course, how they will use the Clinometer while observing the Sun! If you do choose to go outside to do some observations for the Using the Clinometer Activity, be sure to stress they are NOT to EVER look directly at the Sun!


Retinal Damage caused by looking at the Sun

They will be anxious after a couple of minutes to get on their own. Have them choose partners (or assign) and hand out the Using the Clinometer Activity. Each student gets their own page even though they will be working together.

My classroom used to be right across the hall from the school's auditorium. Perfect because of the height of the ceiling! I put masking tape X's about 4 inches across at about 10 - 15 places in the auditorium all around the space. I labeled each with a number and wrote what to measure, using a Sharpie. I took each class into the auditorium to take measurements with their Clinometers. (This works great because you can take all the measurements, and by looking at their papers, actually know who is really off and needs your help.)

You can do the same with your students. Pick a large space, such as an auditorium, gymnasium, or outside, even. Take your students there after some talk about proper behavior.

They all find an X and get busy. Each one takes a sighting with the partner taking the reading. Then they switch. They need to be sure they use their own Clinometer as you want them to be familiar with their own instrument.

They stay where they are and when all seem done, you can blow a whistle, ring a bell, or holler, "Time to move!" and they move in a ring around the auditorium/space to the next number. Be sure to remind them to record on the corresponding number on the Activity Sheet. This can also be done outside, especially if you have tall buildings and trees close by.

Click here for a fun Improve your Clinometer Activity. NOTE: Some possibilities for Improving: Adding more tick marks for degrees, Adding a handle, Adding a heavier weight such as a large washer, Attaching the Clinometer to the middle of the Compass Rose.

Come back tomorrow for How to Measure the Sun's Altitude.

Saturday, December 20, 2008

How to Teach Altitude


This blog was supposed to be How to Teach Altitude and Using the Clinometer.

But I'm thinking now that it just needs to be How to Teach Altitude.

So, the point of teaching the "Altitude in the Sky" concept is getting kids thinking of the sky as an upside down bowl. Altitude and Azimuth are the Latitude and Longitude of the sky. The altitude of a star is how many degrees above the horizon it is. The azimuth of a star is how many degrees along the horizon it is and corresponds to a compass direction.


There's more to it than that, but I don't think middle schoolers need to worry about the Celestial Equator and such.


HOW TO TEACH ALTITUDE:

Get your students back in the big circle around your room. Make sure different students are at the cardinal points on the compass (N, S, E, W). Of course, if you wanted to, it wouldn't hurt to review azimuth for a couple of minutes.

Then, go stand in the center of the room. First introduce the ZENITH of the sky.
Does anyone know what the very top of the sky is called? No matter where you are, it's always directly above your head. NOT where the brad is on the Star Wheel, (if you've made Star Wheels) but the very center of the oval that is the night sky. It's right above your head. That's right! ZENITH! (or tell them if no one knows.) What's the place below your foot called? Where you are standing? That's called NADIR.
Then talk about the HORIZON. How there always is one, and how this is where the moon and stars come up from hiding in the Southern Hemisphere as the Earth turns on its axis each night.

Once you have ZENITH and HORIZON established, hold one of your arms over your head pointing at the ZENITH. Stretch your other arm straight out toward the HORIZON. Wiggle your upraised hand.
What is it pointing toward? You got it! ZENITH.
Wiggle your other hand.
What is this one pointing toward? That's right. HORIZON.
Now, how many degrees have I formed with my two arms? Yes! 90 degrees? So what degrees would you say the HORIZON is? Yup. Zero degrees. And the degrees for the ZENITH? You got it! 90 degrees!
Have all the students imitate you. One arm up toward the ZENITH and one arm out toward the HORIZON.
And where are you standing? Does anyone remember that? Right! NADIR! (Wiggle your 90 degree hand.) And what is this pointing toward? Right. ZENITH. (Wiggle your 0 degree hand.) And this? Right. HORIZON. (Just say this next sentence, don't demonstrate!) Raise your HORIZON hand to 45 degrees. (Wait till most of them have it.) Half way up, right? Try for 30 and 60 degrees. (Demonstrate the concept of one-third up from the HORIZON is 30 degrees and two-thirds up from the HORIZON is 60 degrees.)
HERE'S THE FUN PART:
Point to 85 degrees. Point to 15 degrees.(Do several more.)

What about 45 degrees at azimuthal 0 degrees? (You are previewing "coming attractions" here.) Can you all point to 3o degrees at azimuthal 90 degrees? (You might say nobody point yet, five seconds to think about it, count down immediately, 5-4-3-2-1-0 Point!) This gives the slower ones time to think. Stops them from pointing where the smarter ones point.
Move on to USING THE CLINOMETER or move on to another topic, something sit-down, if you wish.

Come back tomorrow for USING THE CLINOMETER.

Friday, December 19, 2008

Teaching Azimuth and Using a Compass Rose


So, all your students have made a Clinometer. Now what do you do?

Well, first you have to teach altitude and azimuth, but because they have made their Clinometers, they are more likely to pay attention while you teach the basics.

I would recommend holding off teaching how to use the Clinometers for a bit. Teach how to use a compass first.

TEACHING AZIMUTH USING THE COMPASS

If you are lucky, you will have a class set of compasses, maybe even orienteering compasses. The most fun? Everyone has their own compass. Even small, cheap ones, just enough for everyone!

Have your students help push the room's tables or desks toward the center of the room. Have everyone stand in a ring around the outside of the room.

Run them through a series of review exercises. Start with lining the needle up with north, of course. Ask them to point to north. Then have them all point to the east, the west, the south, etc. Then try for the fancier ones, like southwest, southeast, etc. If they do well with this, throw in south-southwest and see if anyone knows these, or can work it out.

During this session, have volunteers stick large printed labels of the various compass points on the classroom walls. My classroom was not facing true north so the walls were all the southeast, northwest. North was in a corner. Made it easier to have them up for my students. Use sticky putty on the backs of the labels. Take them down at the end of each class so the next can put them up, too. You can leave them up after your last class leaves.

Now, here's the really fun part. REALLY TEACH AZIMUTH! Make sure your students are evenly spaced around the edge of the room and in a circle of sorts. Run through a tough, quick review of what you just reviewed and add on:
  1. Raise your hand if you are at north. (Should only be one hand up. If no one is perfectly north, have one move into that position.)
  2. What degrees is the North person? (If no one knows, ask them to guess. Don't tell them outright. Lead them by asking how many total degrees in a circle, and so on. They should see that North is both 0 and 360.)
  3. Move on to South. Raise your hand if you are at South.
  4. What degrees is the South person?
  5. Repeat for East and West.
  6. Move on to northeast, southeast, northwest, southwest.
  7. Go over all again. This time have everyone point to the representative person. Always ask for degrees and compass point.
  8. Try a couple of the south-southwest or north-northwest, etc., but don't do much if they are on overload.
  9. NOW have everyone walk a quarter turn around the room. Go over many of them again.
  10. Repeat again if they can handle it. Otherwise move on to the worksheet.
NOTE: We will do this type of Virtual Compass tomorrow, only use altitude in the sky instead. When you put them together, you really have something, my friends! I've give the details on these variations in the coming days.

After you think your class understands the compass points and degrees, have them sit down and give them all this worksheet which reviews what you've just covered.

TEACHING AZIMUTH USING THE COMPASS ROSE


You can do something similar using paper compass roses. Click here for a good one you can have your first class glue the entire page onto cardboard. Smooth carefully. (You now have a complete set for the rest of the year. Just be sure to number them and collect back each hour.)

Click here for a fun Compass Rose review worksheet that uses a world map. Click here for a blank one from Enchanted Learning. Click here for another good review page.

With a Compass Rose, you need to masking-tape or chalk a north-south line on your floor or in the parking lot or on the concrete playground. Your students put their compass roses on the north-south line, all norths facing north and move themselves around the rose, always looking at the direction from across the rose. Works great if you don't have compasses!

Run your students through a review similar to the above. It will be slightly different but they should all be moving around their compasses. Stand on the point would be in the correct position. Look to the northwest, they would be standing southeast looking to the northwest. NOTE: You may need several north-south lines on the floor/pavement so they all have room to walk around their roses.

Click here for the complete Teaching Azimuth by Using a Compass or Compass Rose Pdf! (Coming soon.)

Come back tomorrow for How to Teach Altitude and Using a Clinometer.

Thursday, December 18, 2008

Building the Sun Clinometer


I love having kids make scientific instruments!

Making scientific instruments requires a certain mindset from students. They have to be careful, precise, and CARE about what they are doing. Basically, if you are picky-picky in the grading, but cheerful and encouraging, you will be thrilled with the results!

Some students who are normally sloppy will rise to the occasion and make beautiful instruments. I personally believe that if you push kids to dig deep and find the BEST they've got inside themselves, THIS is what gives them self-confidence in themselves! Not empty praise!

So, in the making of the Clinometer, you need to set the stage correctly. By that, I mean:
  1. Have all the materials collected.

  2. Have a couple of Clinometers made by you and labeled with your name.

  3. Have the Rubric run off.

  4. Have the Clinometer Directions run off.

Here's how you introduce the day:

Show your Clinometer to the class. Talk with enthusiasm about how you will be going outside every sunny day for the next month to take sun measurements and once a week after that for the REST OF THE YEAR. Encourage them to make a really good one because it must be properly calibrated to get good measurements. Tell them you will know for sure if someone's Clinometer isn't made correctly because their measurements will be different from the class average. Tell them you are going to be picky in the grading so that everyone has a good Clinometer to use.

Go over the Directions and the Rubric with them step by step. Don't repeat yourself at all! This is important. You want them to hear it once and then look at your examples later if they missed something. There is great value in not overdoing the set-up. Quick and clean, I say. Them set them loose.

Put some fun music on the CD player. I love playing a CD collection of science fiction movies and having them guess what movie it is.

When they are done, they line up by you with their Clinometer and the Rubric and you grade them on the spot. If they are less than perfect, give them a chance to go back and fix the errors and come back to get a new grade. THIS IS VERY IMPORTANT. By giving them a second-chance, they will TRY HARDER!

Tell them you will teach them how to use this Clinometer tomorrow and move on to the next thing if you have time or dismiss the class.

Be sure to collect the Clinometers in a bin labeled for their class.

Come back tomorrow for Teaching Azimuth and Using a Compass Rose.

Click here for the complete Build a Sun Clinometer Pdf, including a fun Improve Your Clinometer Follow-Up Activity!

Wednesday, December 17, 2008

Measuring the Sun's Movement


For the next few days, I'll be talking about how to excite your students to follow the Sun.

For many years, my Earth Science classes measured the Sun's movement across the sky in three seasons and plotted and studied what that meant. It was one of the most meaningful and exciting things I've ever done.


First we had our students build Sunscopes. I'm going to offer a simpler Sun Clinometer to have your students build.


Then you have your students measure the altitude of many things inside and outside your school until they understand how to measure Altitude which measures height above the horizon in degrees.

You also have to teach Azimuth which uses a compass and indicates the direction from north in degrees.

Finally, by taking and plotting the measurements in the fall, winter, and spring or early summer, you can show the seasonal changes of the Sun in the sky. This touches things like length of day/night and where the sun is in the sky during each season.


I had a set of clear plastic domes that we used to plot the three seasons with wax pencils. Even kewler!


This was one of the biggest ongoing projects I've ever done. It was worth all the work. It real REAL SCIENCE in its purest form: OBSERVATION. I loved it. I'm hoping some of you will, too!

STAY TUNED!

Friday, December 12, 2008

The Art of NOT Answering Questions


I was famous for not answering a student's questions.
They would get really frustrated; but I stood my ground. In my opinion, not answering questions is not enough. A teacher needs to do more!

I would also ask pointed questions to lead the student to his/her own answer. I believe the way to develop an inquiring mind in our young people, using science as the vehicle, is to use the Socratic Method.


NOT ANSWERING QUESTIONS is an art. Once you train yourself to do it, many benefits appear as if by magic! It tells the students you know they can figure it out for themselves, which fosters self-confidence. They start to think for themselves!

If a student expresses irritation with me, I calmly explain what I'm doing. How the easy way of just answering their questions is NOT a favor to them! How learning to see a question through to an answer all alone makes them strong. Most students end up liking this method.

Students really want us to push them to think on their own. Being successful at something that's hard is wonderful! Give your students that gift!

CONSIDER THIS: Don't answer you students questions. Ask another QUESTION!

Thursday, December 11, 2008

Movie Day


Need a break? If you're teaching Geo. History right now, you're in luck!

Show the movie, Jurassic Park!


Here's a Fun Worksheet that asks some good Earth-Science-type questions.

Have a good day!

Wednesday, December 10, 2008

Teaching Plate Tectonics Packet


The beta version of the Plate Tectonics Packet will be available on January 1, 2009!!

Many thanks to all of you who have supported me over the years. And "bothered" me enough to get the Plate Tectonics Packet finished! Or at least close to finished!

Plate Tectonics has been a massive project. I have created THREE foldables, including one on Wegner's Evidence, which is one I wish I'd had in my own classroom! I know from experience that anything HANDS-ON makes learning more lasting AND more enjoyable. I know my students would have understood Wegener's evidence so much better if I had used a Foldable to teach the evidence!

Since I'm now retired, those of you still in the profession will have to carry on for me. Just let me know if you use the Wegener's Evidence Foldable! Did it work? I'll be dying to know!

The Packet also contains five PowerPoints with FollowSheets, as well as several wonderful lab activities that get across the drifting continent concept, the plate boundaries concept, and Wegener's evidence concept.

But most of all, it includes a sequence of events that will make a difference in a teacher's life, I believe. It took me years to really understand how to teach Plate Tectonics! It's such a complicated subject! I am happy to pass on what I finally figured out! I remember the relief I felt when I taught Plate Tectonics the first year with all my "ducks in a row!" It felt wonderful to finally have it right!

And I know there are many of you out there who would like to feel that feeling because you email me every week: Where is the Plate Tectonics Packet?

Well, I am happy to say, Teaching Plate Tectonics Packet will be available on January 1, 2009. Email me to reserve your copy!

Sunday, December 7, 2008

Teaching the Wind


Wind Turbines in Iowa

Take your students outside for a lesson on measuring wind speed and direction. It's always great fun to get outside for a science lesson!

I've done this many times and just love taking kids outside with a lab. They will be running all over the school yard, but they will all be busy doing science!

First, have them make a simple wind anemometer inside. Then calibrate the anemometer outside using the Beaufort Wind Scale. This might take several days, because you want several different wind speeds to calibrate. Just going outside for five minutes to add another calibration is a good adventure. Builds anticipation for the actual Wind Lab!


The actual day of the Wind Lab, have them measure wind speed or wind speed AND DIRECTION in several different locations. You'll need a schoolyard map, including the "footprint" of the school building for this. When all the information is collected on one transparency when you get back inside, you have a map of the wind and its various ebbs and flows all around the school.

Students will begin to see what obstructions can do to the wind, how both speed and direction can be affected.

CONSIDER THIS: Make a Wind Anemometer. Calibrate the Anemometer. Measure the Wind in your Schoolyard. View a PowerPoint about the Beaufort Wind Scale.

CONSIDER THIS: Kick it up a notch and teach Wind Turbines and using Wind to generate electricity! Wind Energy Education Resources.

FUN LINKS: Wind Lab, including making and calibrating an Anemometer.
Beaufort Wind Scale PowerPoint.
Make a Beaufort Wind Dial.
Make a Pinwheel Wind Turbine.
Make a Simple Wind Turbine.

Saturday, December 6, 2008

Cut & Paste PowerPoint FollowSheets


(Click on images to see a larger picture.)

I've had a couple of teachers ask me lately to explain just what Cut & Paste FollowSheets are.

So here goes:

I'm going to share with you the VERY FIRST one I ever did. It gave me chills. Really, I'm not joking here!

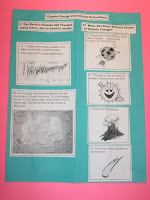
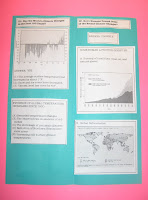
I had a Climate Change PowerPoint I wanted to show and I was trying something new that day.

I let my students choose any color of colored paper they wanted. They had to fold the colored paper in half hot-dog-bun style, so they had two long, narrow columns on each side of the paper.

Then I gave my kids a couple of handouts and told them to cut all the boxes out and lay them around their colored paper.

Before I started the Climate Change PowerPoint, I asked them to paste the boxes with Roman Numerals on top of each column.

Then we watched the PowerPoint, during which they were supposed to paste the rest of the boxes in the correct columns as we worked through the PowerPoint on Climate Change.

WHAT GAVE ME CHILLS WAS THIS: Every single student was working! And this was a class with a half-dozen malcontents sitting in the back of the room! EVERY SINGLE STUDENT WAS BUSY!

I'll be honest with you. This didn't happen very often for me! I rarely got everyone on the same wavelength at the same moment in my classroom. There were always one or two holdouts. Not to say I wasn't trying all the time to find activities that would capture every one's attention and get them involved. But it was very rare to get everyone doing the assignment.

I remember at the time telling myself to file this away in my memory because I would want to revisit it again in the future. I would want to remember what got them all so intent on paying attention.

I know it was mostly the active learning element and partly it was such a uniquely NOVEL WAY to watch a PowerPoint.

I hope you will try this type of assignment. It's good for more than one reason. Sure it gets them ALL involved. It also gives them good notes with the words I want them to have down to study from. It's a good active learning activity.

CONSIDER THIS: Try my Climate Change PowerPoint when you reach this topic in your curriculum. Use the Cut and Paste FollowSheet. OR MAKE YOUR OWN FOR OWN OF YOUR OWN POWERPOINTS!

FUN LINKS: Climate Change PowerPoint.
Climate Change Assignment
Climate Change Answers

Friday, December 5, 2008

Teaching Constellations


If I had to pick the most favorite teaching moment of my teaching career, it would be teaching about Constellations.

I love teaching constellations because kids seem to have a real "need to know" about the night sky.

I always told them the story about how my Dad woke me up in the middle of the night when I was about eight years old (probably only 10 pm) and took me out in a row boat in the middle of Little Sand Lake in Michigan and taught me the constellations. Then I tell them, this is what being a parent is all about, making memories with your children they will revisit the rest of their lives.

They seem to relate to this and work very hard to learn them. I always had a Bonus Assignment during this time. They could find a constellation or group of constellations and sketch their house or some other landmark and add the constellations and bring it in for bonus points. What a great moment when a student comes in your class and says, "I saw Orion last night and it was HUGE!"


If you visit my Astronomy webpage, you can find the details for teaching Constellations.

Here is a quick summary of what I would typically do during Constellation days:

  1. Make a Star Wheel - I love leading students through the construction of a scientific tool!
  2. Teach How to Use a Star Wheel - worksheet, games, practice, etc.
  3. Constellation Lab - dot-to-dot activity that really teaches Constellations!
  4. Constellations PowerPoint - let them add extras to their Constellation Lab while they watch!
  5. Play more Star Wheel games!

CONSIDER THIS: Special teaching moments stay with you for your whole life. Add some teaching memories to your own life by teaching the wonder of the Universe, including Constellations!

FUN LINKS:
Basic StarWheel
Cootie Catcher Constellations Fun!
A REALLY cool online PPT you can use on your Smartboard!

Tuesday, December 2, 2008

Using the Five E's when Teaching Science


After over 30 years of teaching, in my opinion, the Five E's still ROCK!

Yup, and I certainly never heard about them in the 60's when I was in college.

I think I always understood them to be a good way to teach. Clustering teaching strategies around the Five E's has always been natural to me. I'll bet that's how they were "invented." Someone must have actually LOOKED at good teaching!

What are the Five E's? Engage, Explore, Explain, Elaborate, Evaluate.

Looking back over the years, I see that most of my happiest teaching days were spent applying the Five E's. I like the flexibility of the system. One day can be all Engage and Explore. Another day can be all Explain and Elaborate. I love coming up with new ideas for the each part!

If you look at what I have on my website, you can probably put the activities into these five categories yourself. Many go in multiple categories.

ENGAGE - PowerPoints with Images only, Team Games, Introductory Labs or Activities, YouTube Videos
You need to catch their attention, create a need to know, make it worth their while, make them WANT to learn the lesson. I have never believed that LECTURES did a good job of this. So early on, I was always on the lookout for activities that would ENGAGE my students. You should, too!

EXPLORE - Pairs or Team Games, Lab Activities, Pairs Worksheets, YouTube Videos

My Science Methods professor at the University of Minnesota was the famous Roger Johnson--the collaborative guru. He thought kids needed time to PLAY with materials to get a feel for them. It's hard to squeeze this in with all the state requirements nowadays. Try, anyway!


EXPLAIN - PowerPoints with FollowSheets, Foldables, Lab Activities, Skits

I went into teaching with a distaste for the LECTURE. Any college grad probably feels this way, but I went one step further, probably because Roger Johnson had showed it was possible. I looked for ways to INPUT NEW MATERIAL without standing in front of a class talking at them. If you HAVE to lecture, I recommend the
PowerPoint. It's more visual, and if you add a Cut and Paste FollowSheet, you've got an active element, too!


ELABORATE - Cut and Paste Vocab, Pairs or Team Games, Skits, Videos, Kid-Produced PowerPoints

This is the fun part. You've got them into the topic and now you want them to LEARN it, explore it, play with it in a controlled manner, etc. I love labs, projects, anything that has them working together in pairs, teams, by themselves, you name it. Just so they are DOING something.

EVALUATE - Pairs Quizzes, Group Tests, Regular Tests, Pop Quizzes, Individual or Group Presentations, Lab Write Ups.

Why just go with the traditional test all the time? Try something new! That's why I love Pairs Quizzes and Team Tests. If you are careful in how you set them up so the "smart one" doesn't do all the thinking, you get some nice collaboration and a different approach to showing what you've learned. This is what the "Rubric" is all about.

CONSIDER THIS: Look for creative, unusual activities that actively engage your students in the Five E's.

FUN LINK: Check out my How to Write a Science Lesson page.

Monday, December 1, 2008

Using Skits in the Classroom


I love using SKITS in the classroom! They bring a concept home to roost.

Here are a few examples of skits I've used in my classroom. They all worked extremely well.
  1. Volcano Skits - Assign groups one of the three main types of volcanoes: composite, cinder cone, or shield. Require each group to illustrate the following in their skit: the slope of their volcano, the type of eruption, and the type of lava. They cannot talk, but can makes noises, especially to make the eruption noises. Everyone has to participate for full points. Let the rest of the class guess which one is being presented instead of having a group announce it. I've seen some great stuff with this assignment. They especially LOVE making the sounds associated with each type of volcano. One group ripped paper up to make the cinders and ash exploding out of a cinder cone. They cleaned up the mess, so it was worth it to me.

  2. Patterns of the Periodic Table Skits - Assign groups one of the main Patterns of the Periodic Table. They must keep their topic a secret because other groups will guess what their pattern is during their skit. I've seen some wonderful skits! One year a group used music to illustrate metallic, metalloid, and nonmetallic. Obviously, the metallic group was a hard rock band! They even mimicked plugging in their guitar.

  3. Geologic Eras Skits - Assign each team of students an Era and give them 5 minutes to come up with a pantomime illustrating at least two geological and two biological events from the Era. No words or sound effects this time! Have the other students guess which Era is being dramatized. Good way to review the main geological and biological characteristics of the Eras.

  4. Half Life Skit - Not really a skit, but it's got kids up and moving. Have the entire class stand up in the center of the room, all huddled together. Then touch the shoulders of students and have them step out of the "huddle" and stand around the outside of the room. Eliminate half at a time. As each "half-life" is completed, pause and ask them what just happened. You can either tell them what you are doing, or continue on, taking half out each time, and pausing for them to figure it out. How many half-lives to completely "decay" our class? If one half-life takes about 1 minute, how "old" is the class?